We Were Here Tomorrow Laser and Crystal Puzzle Solution (Optics, Master Emitter)
Updated 21 Oct 2026 · Game version: Launch build (October 2026) · By the Indie Walkthrough crew
The answer in one line
Send the beam through three crystals in this order: Pingosius Crystalis (spiky, little balls on top, in the yellow room), then Rupium (smooth egg cluster in the turquoise room; the beam comes out green), then Cattonimus (the middle crystal rock under the Master Emitter), and finally into the emitter. Skip the red room and never pass the beam through the same crystal twice.
The clue board read the same in two separate playthroughs. We only saw the full solve in one session, so if the emitter still says wrong configuration, check the order note again (see the fixes below).
Where the puzzle is
Optics comes right after the swirling vortex room. A voice line says the Rift instability is at 96% and that the Laser Array is offline. Both explorers enter the same two-level hall but on different floors, and can see each other across it.
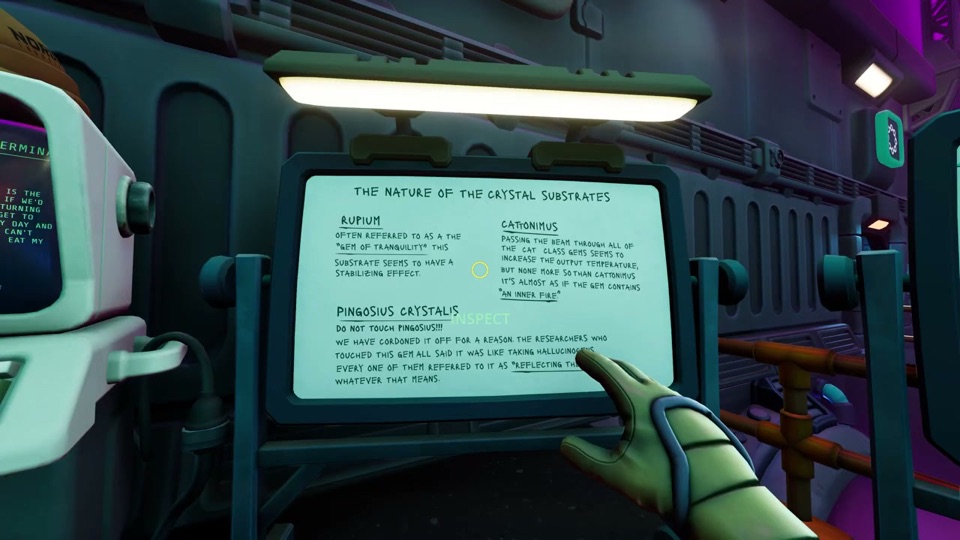
Yellow's side has the clue board THE NATURE OF THE CRYSTAL SUBSTRATES, a blueprint titled BIG HONKIN' PEW PEW MACHINE (it labels the BEAM ENTRY and MASTER EMITTER) and a NORCEK message terminal. The Master Emitter is the big gun hanging in the middle of the hall.
Side rooms are marked with coloured frames: a red room, a yellow room with spiky crystals, and a turquoise room (ring of small circles on its frame) with a smooth crystal cluster you can only reach with the beam.
Not sure you’re in the right place? Search for your room in Quick find tool.
What you need
- Orbs and crystal pieces from the shelves and side rooms. Grab every one you see; the hotbar shows how many of each you carry.
- Both players on the walkie-talkie. In our sources the voice chat cut out for a few minutes here, which made this puzzle much harder; if it drops, restart or use another voice channel.
Step by step
Phase 1, both: turn on the laser and pass the beam up and down
One explorer switches on a laser. The beam has to reach the next holder, and some holders are on the other player's floor. Drop an orb or crystal piece into a holder in the beam's path. Some holders have handlebars so you can swing them round; others are fixed. Call out which holder your beam is hitting and which floor it has to go to next. Phase 1 ends when the chain reaches its target and more rooms open.
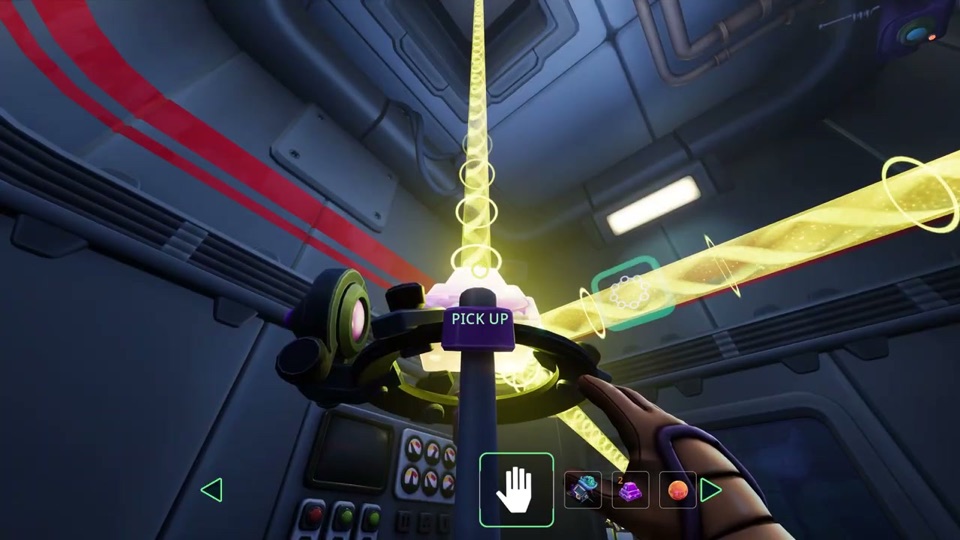
Frame from “WE WERE HERE TOMORROW Gameplay (PC 4K 60FPS) - No Commentary” by fgw. Watch at 1:46:37 Know your pieces: round orbs vs pointed crystals
In our sources, round orbs kept the beam on the same level and the pointed purple pieces sent it up or down to the other floor. If the beam suddenly goes dark, someone is holding a piece in its path.
Inferred: pieced together from our sources, not shown step by step in a video
Phase 2, both: collect everything
After the warm-up, sweep the shelves and side rooms for more orange orbs and purple pieces. In our session one side room's door shut later, so do it early.
Yellow (by the board): read the three crystal notes
Read the board aloud. Rupium is the gem of tranquility and has a stabilizing effect. Passing the beam through the cat class gems raises the temperature, Cattonimus most of all; it seems to contain an inner fire. Pingosius Crystalis carries a warning not to touch it; researchers said it was like reflecting their soul. Say to your partner: three special crystals, one calms, one heats, one is the mirror one.
Red: describe the crystal drawings
Red has a sheet of pencil drawings of six crystals with their names. Use it to tell yellow which real crystal is which: Pingosius has big and small spikes with a few little balls on top (a look-alike has the balls elsewhere), Rupium is a cluster of smooth egg shapes, and the three rocky cat class crystals differ by how many crystal clusters grow out of them.
Inferred: pieced together from our sources, not shown step by step in a video
Find the order note
The board does not give the order. A readable computer near the puzzle has a short rhyme: begin with the mirror, the serene stone second to steady the flow, the fiery heart last. Match it to the board: mirror = Pingosius Crystalis (reflecting their soul), serene stone = Rupium (tranquility), fiery heart = Cattonimus (inner fire). In our session the players found this note only after many failed tries, so inspect every screen.
Inferred: pieced together from our sources, not shown step by step in a video
Yellow (yellow room): pick the right Pingosius
The yellow room has two spiky blue-green crystals on holders. Ask red over the walkie-talkie which one has the little balls on top, and route the beam through that one first. The beam starts on this side, so do not send it into the red room first: the red room is a dead end.
Inferred: pieced together from our sources, not shown step by step in a video
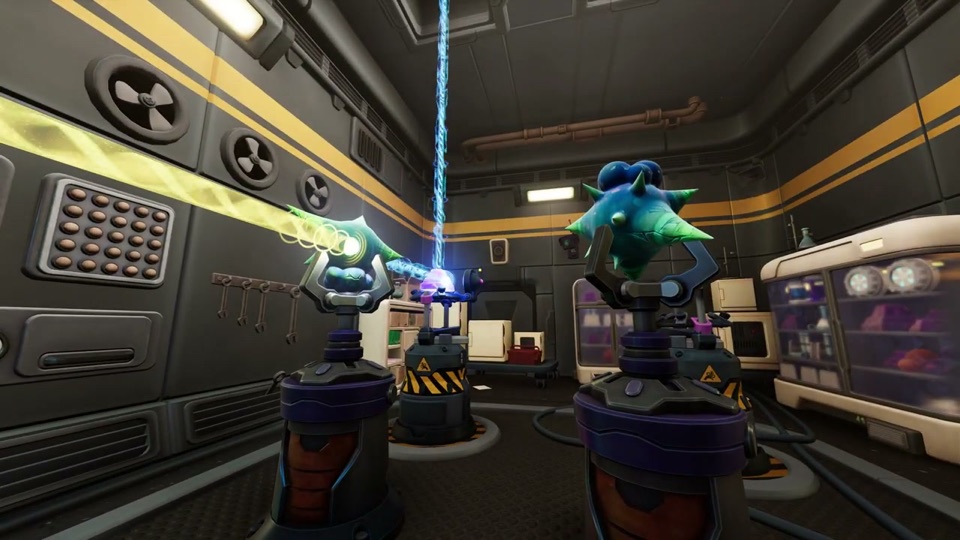
Frame from “WE WERE HERE TOMORROW Gameplay (PC 4K 60FPS) - No Commentary” by fgw. Watch at 1:57:48 Both: through Rupium in the turquoise room
Nobody walks into the turquoise room; you shoot the beam in through its window or vents. The Rupium cluster sits on a fixed holder in the middle. When the beam passes it, it comes out green. Tell your partner: green beam is leaving turquoise, where does it come out on your side?
Inferred: pieced together from our sources, not shown step by step in a video
Both: Cattonimus last, then the emitter
Bring the green beam back into the main hall and through the middle crystal rock in the row under the Master Emitter (in our session the one with two crystal clusters). The holders there turn only about 180 degrees, towards the room. Put a pointed piece under the emitter so the beam goes up into it. When it works, the subtitle reads “You reactivated the Laser Array! Great work.” and the way out is blasted open.
Inferred: pieced together from our sources, not shown step by step in a video
If it doesn’t work
- The screen says WRONG CRYSTAL CONFIGURATION / CHECK NOTES FOR MORE INFORMATION.
- The beam reached the emitter but in the wrong order or through the wrong crystals. Order is Pingosius Crystalis, Rupium, Cattonimus. In our session the first tries skipped Pingosius or used the look-alike without the balls on top.
- We have the right three crystals but it still fails.
- Check that the beam does not pass through any crystal twice and that it never goes through the red room. A loop through the turquoise room and back is the usual cause: once Rupium has turned the beam green, send it straight on to the main hall.
- I can't move the crystals in the yellow or turquoise room.
- Those special crystals are fixed in place. You only change the orbs and pieces in the holders around them so the beam goes through the right one.
- One of us can rotate holders and the other can't.
- That is intended. The player whose holders only accept pieces chooses orb or pointed piece; the player with rotating holders does the aiming. Say out loud which holder you are at before turning it.
- Is the order the same in every playthrough?
- The board text was word for word the same in two separate playthroughs. We saw the order note and the final solve in only one session, so we cannot fully confirm it never changes. If your note says something else, follow the note and use the board to translate mirror, serene stone and fiery heart.
Sources
- WE WERE HERE TOMORROW Gameplay (PC 4K 60FPS) - No Commentary by fgw Timestamps used: 1:36:01–1:59:01 (video ends before the solve)
- We Were Here Tomorrow! AMAZING Co-op Puzzler with Zedaph! by Tango Tek Timestamps used: 2:29:28–3:18:08 (order note at 3:15:03)
- The Puzzle Boys are BACK!!! Playing Co-op Puzzler by Zedaph Timestamps used: 2:32:13–3:20:48 (success line at 3:20:48)
Spotted a step that’s wrong? Tell us and we’ll fix it and update the date.
indiewalkthrough isn’t affiliated with Total Mayhem Games.