
We Were Here Tomorrow 4x4 Light Grid Puzzle Solution (green key card printer)
Updated 21 Oct 2026 · Game version: Launch build (October 2026) · By the Indie Walkthrough crew
The answer in one line
Make the printer's 4x4 grid match the pattern on the lit lab cabinet. The small player moves a blinking cursor with the arrow buttons and toggles lights with the centre button; the big player watches the grid through the window and calls the moves.
The pattern may change between playthroughs, so copy your own cabinet. In our session the lit cells were row 1 col 2, row 2 col 1, row 3 col 2, row 4 col 3.
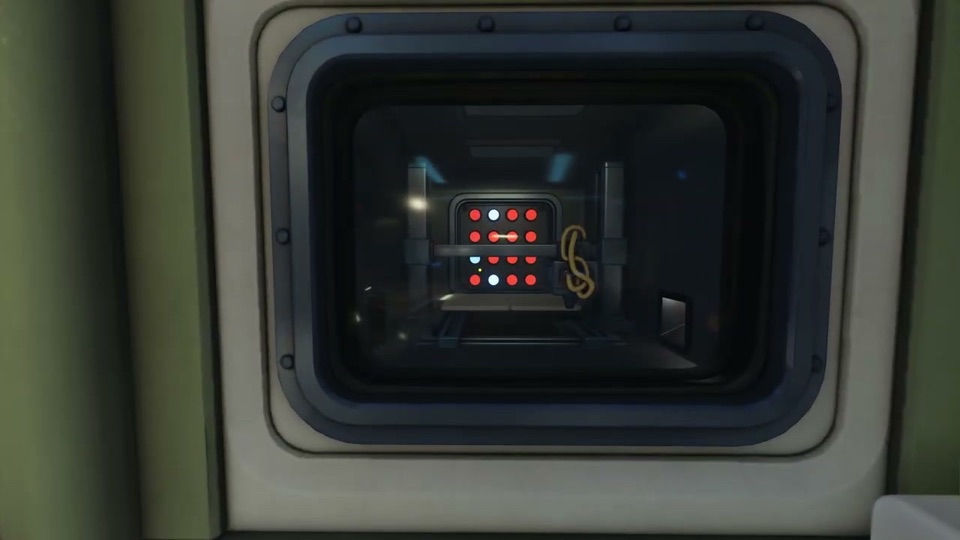
Where the puzzle is
Inside the 3D printer, after the spinning dials. The small player (red in our session) stands at a pad with arrow buttons; above them, through a window, is the printer: a 4x4 grid of red lights with a print-head bar across it.
The big player (yellow) is in the lab and sees the same grid through a round-cornered window. Nearby are green lab cabinets; one of them is lit and shows a 4x4 pattern. That is the target. The small player can also see the cabinets through their window.
Not sure you’re in the right place? Search for your room in Quick find tool.
What you need
- Both players. The note "Instructions on Clive's Care" lies near the printer, but nothing on it is part of this grid.
Step by step
Find the target on the lit cabinet
Look for the green lab cabinet with a 4x4 display. Only one is lit at a time. Read its white cells row by row, top to bottom, left to right, for example "row 1 column 2".
Inferred: pieced together from our sources, not shown step by step in a video
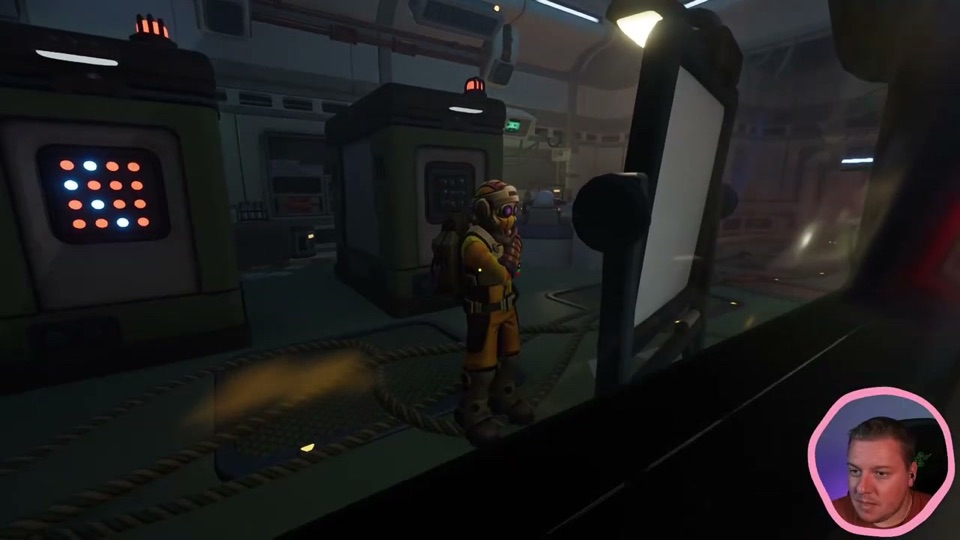
Frame from “The Puzzle Boys are BACK!!! Playing Co-op Puzzler” by Zedaph. Watch at 1:30:24 Red (inside): press the arrows to find the cursor
Press any arrow button. The lights in the printer change. Yellow will see a blinking red light: that is your cursor, not a target.
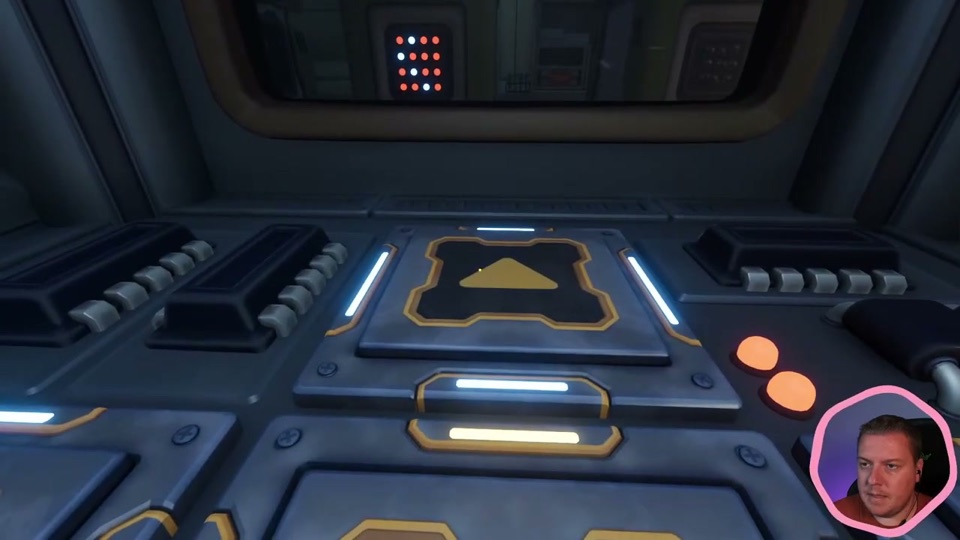
Frame from “The Puzzle Boys are BACK!!! Playing Co-op Puzzler” by Zedaph. Watch at 1:33:37 Yellow (outside): call moves, red toggles
Watch the printer grid and guide one cell at a time: "left twice, now centre", "down and right, centre". The centre button flips the light under the cursor between red (off) and white (on). Keep going until the printer grid matches the cabinet.
Take the green key card
When the grids match, the printer makes the green key card. Then the small player takes the teleporter back and the big player enlarges them at the shrink machine.
Inferred: pieced together from our sources, not shown step by step in a video
If it doesn’t work
- Which light is the cursor?
- The blinking one. White lights are toggled on; red lights are off. You can't move a lit light, only the cursor.
- Nothing happened after the last toggle.
- Check each cell again. A missed or double press is easy; the print-head bar can hide row 4 from the window, so ask the small player to move the cursor there and check.
- Is the answer always the same?
- Probably not. The pattern we saw on the cabinet was row 1 col 2, row 2 col 1, row 3 col 2, row 4 col 3. A second playthrough lit different cells on its printer grid, but we never saw that player's cabinet, so we can't prove it. Always copy the cabinet in your own game.
- Does Clive's care note matter here?
- Not for the grid. It is a funny note about Clive the gerbil and the shrink platform. We found no number or pattern on it.
Sources
- WE WERE HERE TOMORROW Gameplay (PC 4K 60FPS) - No Commentary by fgw Timestamps used: 47:22–50:27
- We Were Here Tomorrow! AMAZING Co-op Puzzler with Zedaph! by Tango Tek Timestamps used: 1:26:47–1:31:35
- The Puzzle Boys are BACK!!! Playing Co-op Puzzler by Zedaph Timestamps used: 1:30:24–1:33:37
Spotted a step that’s wrong? Tell us and we’ll fix it and update the date.
indiewalkthrough isn’t affiliated with Total Mayhem Games.